
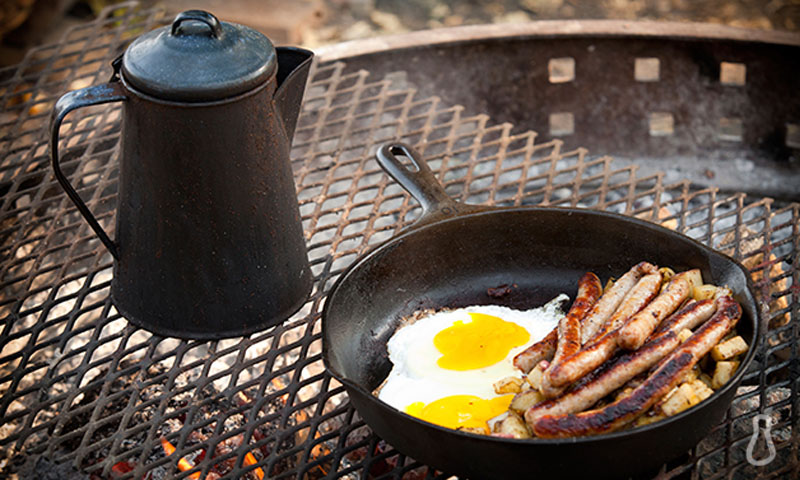
I’m not usually much of a boulderer, but when the opportunity arose for me to climb at Hueco Tanks, one of the best bouldering destinations in the world, I jumped at the chance. I packed up my barely-used crashpad and my beloved Dragons and headed out to west Texas for a 5-day weekend of tent camping, bouldering, and hiking with friends. Sometimes it can seem nearly impossible to eat healthy while camping, but it doesn’t have to be! Below are the steps that I take to plan out healthy meals for my camping/climbing trips.
1. Plan ahead
How many nights are you camping? Will there be a grocery store nearby? Do you have room for a cooler? Do you have the equipment to cook your own meals? Will you be in bear country? Knowing the answers to these questions should help you create your meal plan. For instance, if you plan on bringing a cooler, then you’ll have more options for food. If not, then you’ll want to choose foods that don’t require refrigeration.
2. Pick your breakfast
If you’re someone who can eat the same thing for every meal, then this step should be easy. Pick your favorite breakfast meal (the simpler the better), and pack enough for your mornings. This could be an apple with peanut butter, banana and almond butter, eggs and bacon, hard-boiled eggs and salmon, energy muffin, banana bread, breakfast bar, or another favorite breakfast meal. I like to have some salted hard-boiled eggs and an apple with almond butter. If you like to drink hot tea or coffee in the mornings, remember to pack a mug! I somehow ALWAYS forget to bring a mug…
3. Choose a packable lunch or snacks
Some people want a real lunch meal, while others just like to graze throughout the day. Figure out which one you like more, and pack accordingly. Unless you have a smaller cooler to bring with you during the day, you’ll want non-perishable meals throughout the day. If you like to snack, you could bring trail mix, carrots, deli meat, jerky, leftovers from breakfast, fruit, rice cakes with almond butter, banana chips, muffins, breads, bars, etc. If you want a real lunch, you could have a lunch wrap, sandwich, rice crackers and tuna, or a combination of snacks.
4. Decide on dinner
Plan out your dinners ahead of time. Are you a snacker, or do you prefer a larger meal? Will you have a camp stove or a fire? Will you be camping alone or with a group? Depending on your cooking equipment, you can make some pretty extravagant dinners. If you’re cooking over a fire, you can grill just about anything, or wrap your food in foil. If you’ll be cooking with a camp stove, you can make a stir fry, chili, soup, curry, and more. If you’re camping with a bunch of friends, you can plan out your meals together to save some money on groceries. It’s a lot easier to cook for six people than it is to cook for one.
5. Prepare food ahead of time
Once you’ve planned out your meals, see which ones need preparation. If there are any that you can prepare ahead of time, get to cooking! Preparation could include hard-boiling your eggs, dehydrating your meats or vegetables, making your soups, baking breads or muffins, making your own energy bars, etc. The more you prepare ahead of time, the easier it’ll be to cook on your trip.
For our Hueco trip, I baked a bunch of delicious, calorie-dense treats, including Chocolate Zucchini Bread, Cranberry Bars, and Paleo Bran Muffins (recipes below). I also prepared a few servings of some homemade Garlic and Thyme Soup to keep us warm on the cold winter nights. We packed a small cooler with a dozen hard-boiled eggs, some avocados, lettuce, deli turkey, hummus, and homemade soup. Non-perishable foods included Bearded Brothers bars, canned tuna and salmon, Tasty Bites indian cuisine, beef jerky, pepperoni, salami, apples, bananas, and almond butter. Preparing and planning our meals ahead of time was a great success, and I would highly recommend it. Sometimes it can mean the difference between sending your projects and coming up short.
Below are the recipes that I used to prepare some of the meals and snacks for our trip:
Chocolate Zucchini Bread
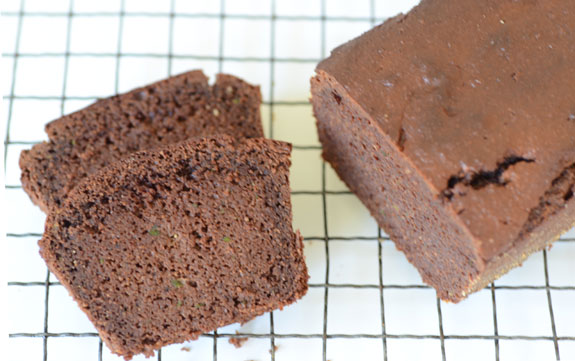
Photo provided courtesy of elanaspantry.com
Makes 1 small loaf
Ingredients
- 1 ¼ cups blanched almond flour
- ¼ cup cacao powder
- ¼ teaspoon celtic sea salt
- ½ teaspoon baking soda
- 2 large eggs
- 2 tablespoons coconut oil
- ¼ cup honey
- ¼ teaspoon vanilla stevia
- ¾ cup zucchini, grated
Directions
- In a food processor
combine almond flour and cacao powder
- Pulse in salt and baking soda
- Pulse in eggs, coconut oil and honey, stevia, then zucchini
- Transfer batter to a greased 6.5 x 4 inch baby loaf pan
, dusted with almond flour
- Bake at 350° for 35-40 minutes
- Cool for 2 hours
- Serve
Recipe from Elana’s Pantry
Cranberry Bars
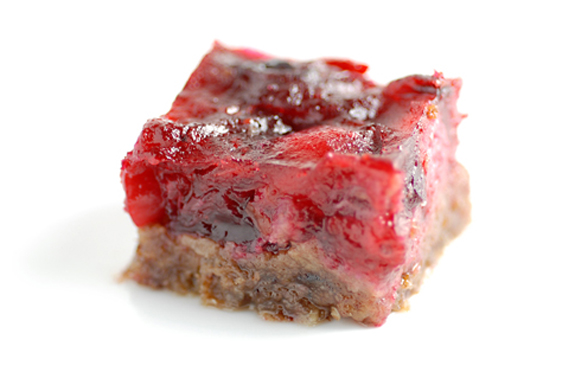
Photo provided courtesy of elanaspantry.com
Makes 16 bars
Ingredients
- 1 cup raw pecans
- 5 dates, pitted
- 1 tablespoon grapeseed oil
or palm shortening
- ¼ teaspoon celtic sea salt
- 6 cups fresh cranberries, picked over (discard bad ones)
- 1 cup agave nectar
or honey
- 1 tablespoon orange zest
Directions
- Place pecans and dates in a food processor
- Pulse in oil and salt until mixture begins to form a ball
- Press crust into a greased 8 x 8 inch baking dish
- Bake at 350° for 8-12 minutes until lightly browned
- To make cranberry topping, place 4 cups cranberries, agave and orange zest in a pot on the stove
- Bring mixture to a boil, then cover and reduce to a simmer 10-15 minutes, until cranberries start to dissolve
- Add remaining 2 cups cranberries and cook covered for 5 more minutes
- Remove mixture from heat and allow to cool for 10 minutes
- Pour mixture over pecan crust
- Allow bars to set in refrigerator for 60-90 minutes, and serve
Recipe from Elana’s Pantry
Paleo Bran Muffins
Makes 8
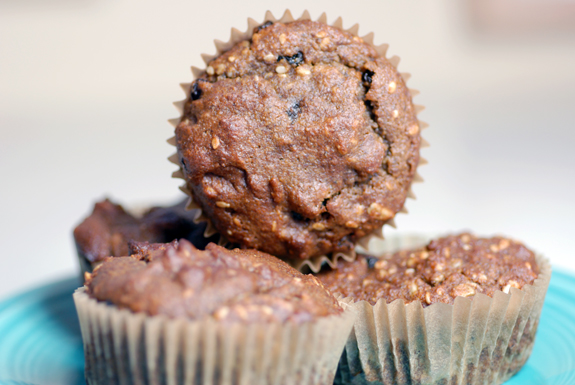
Photo provided courtesy of elanaspantry.com
Ingredients
- ½ cup almond flour
- ½ cup flax meal
- 1 teaspoon baking soda
- ½ teaspoon sea salt
- 6 dates
- 3 eggs
- 2 tablespoons olive oil
- ¼ cup water
- ¼ cup hemp seeds or chia seeds
- ¼ cup chopped walnuts
- ¼ cup coconut flakes
- ½ cup raisins, craisins or dried cherries
Directions
- In a large bowl combine almond flour, flax meal, baking soda and salt
- In a vitamix or powerful blender,
blend dates, eggs, olive oil and water on high speed until very smooth
- Mix wet ingredients into dry, then stir in sesame seeds, sunflower seeds and raisins
- Spoon batter into lined muffin pan
- Bake at 350° for 20-25 minutes
- Cool and serve
Recipe from Elana’s Pantry
Garlic & Thyme Soup
Serves 4
Ingredients
- 2 tablespoons butter
- 1 onion
- 2 celery stalks
- 2 carrots
- 1 whole head of garlic (at least) plus 3 extra cloves
- 1 1/2 quarts chicken stock
- 1 tablespoon thyme (at least) plus extra to finish
- diced chicken (optional)
- chopped leafy greens or other vegetables as desired
- splash of vinegar or lemon juice
- sea salt & pepper to taste
Directions
- Melt butter in a Dutch oven over medium-low heat. Add diced onion, celery, carrots, and a pinch of sea salt. Saute for about five minutes, or until onions are translucent. Meanwhile chop up all of the garlic, setting aside 3 cloves that are finely minced. Add garlic to vegetables, saute one more minute, and add stock, thyme, and chopped leafy greens or other vegetables. Bring to a boil, turn the heat down to low and simmer for about 10 minutes.
- Add cooked chicken if using, a splash of vinegar or lemon juice, and season with sea salt and pepper. Turn off the heat and taste the broth for seasoning. Add more salt and pepper if necessary.
- For those who are under the weather add the remaining finely minced raw garlic and sprinkle in some extra thyme for good measure. Serve piping hot.
Recipe from NourishingDays